Creating an Executable JAR in Intellij IDEA
I’ve been using IDEA for a while now and have been very happy with it. While Eclipse is a great free IDE, IDEA does bring a lot more to the table and is worth the price IMHO. That said, I’ve always felt that creating a JAR in IDEA is not very intuitive. Well, everything is complicated until you figure it out so today I decided to take a few minutes and un-complicate it. Without further ado, let’s get started. The following steps were performed on IDEA 2016.1
Step 1: Select File -> Project Structure

Step 2: In the Project Structure dialog box, select Artifacts. Then click the + symbol to add a new artifact and select Empty from the popup menu. You could also go with From module with dependencies and have IDEA configure it all for you. I think it is also good to the manual process so you are not dependent on any undercover magic.

Step 3: In the settings for the new artifact, select Other from the Type dropdown box. This is important so don’t forget to do that.

Step 4: Then update all other settings like Name, Output directory, Build on make etc. In the Output Layout tab, under the Available Elements panel, select any 3rd party JAR files that you’d like to include with your JAR file and choose Put into Output Root in the context which appears when you right click on your selection. These JAR files will now be present in the same directory as the compiled output of your code. This is slightly different from how Eclipse does it where all JARs are extracted into a single runnable JAR. Both methods work but I like this better as it keeps your code separate from 3rd party JAR files.

Step 5: Once you’ve included all the 3rd party JARs, it is time to include your code. To do that, click the Create Archive button in the Output Layout tab.

Step 6: In the popup dialog that appears, enter the desired name of your JAR.

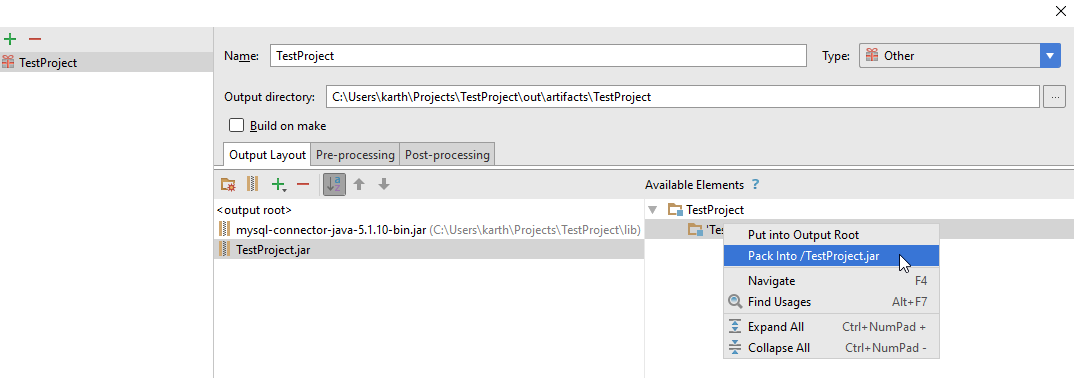
Step 7: Now right click on the compiled output of your code under the Available Elements panel and choose Pack into /your-name.jar option in the context menu that appears. Here your-name would the value that you entered in the previous step.
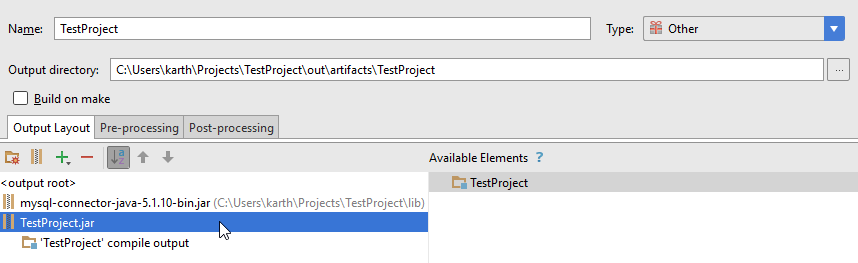
Step 8: If you did everything correctly, your final settings dialog should look something like this with both the 3rd party JARs and your JAR configured correctly.
Step 9: Now it is time to create the MANIFEST.MF file that will link all these 3rd party JARs to your JAR and create an executable JAR as the end result. Here you can use an existing MANIFEST.MF file from the project if it already has one or create a new one. In my case, I went with creating a new one.

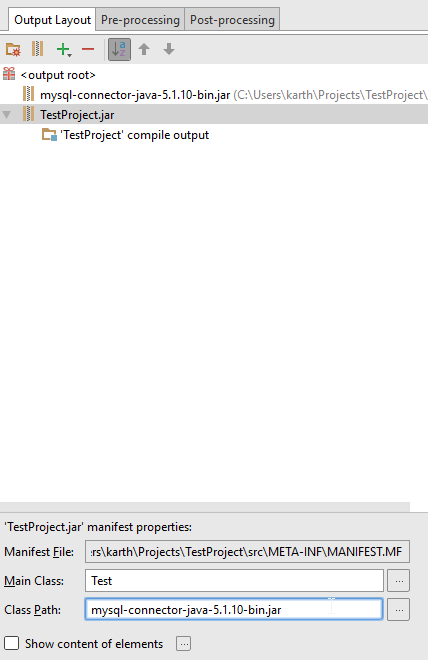
Step 10: The 3 main steps here are to: select an output folder for the MANIFEST.MF file, select the main class and enter the class path. I always go with the src folder as the output folder. As for the class path, I just enter the name of each JAR file that I’ve included in the project. So your end result of this step should look like this:
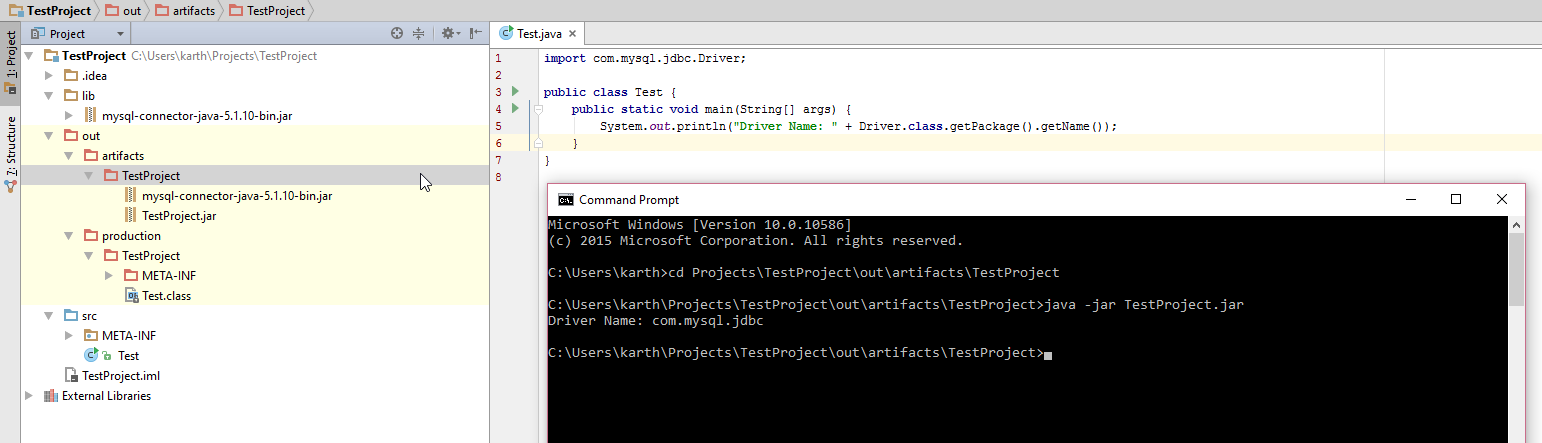
Step 11: At this point you are all set. Go ahead and generate the artifact. You will now see IDEA create the artifcat in the ../out/artifacts/.. folder. When you execute the JAR file from the command line, you can see that everything works perfectly.
Cheers and happy coding!